h1.post-title, .post h1 #Blog1 h1, #Blog2 h1 { font-size:1.5em; }
Tampilkan postingan dengan label Blogger tricks. Tampilkan semua postingan

How to write best content to your blog post


 write best contents for your blog

Hello everyone, today I am telling you about “how to write best content to your blog post”. Because we know that the main thing for a blog or site is post content and the content is also known as blog King or we can say it cost think about contents for your blog. And when you think about good content for your blog then remember two points. 1). What to write. 2). How to write. I think these two points are making your blog perfect. So let’s start to discuss about these points.
So first of all I tell you about “What to write”- Before starting your blog post just think what you want to write in your post and how it helps other. Think about post matter, and take some time to prepare fully your post. If you know fully about the new post then do not write it directly in your blog and do not directly publish it. Write it into any notepad or word document. And one more time check it starting to end, and if you find all things are right then write or copy it into blog post. But if you don’t know fully about your new post then first of all collect more information about it and consider on the information is right or not then write it into your blog. Because the small mistake turns your blog high to low.

Now we come to the second point that is “How to write”- when you starting a new post then think like as a visitor, how you read another bloggers blog and how they serve it to you. Then as like you can serve your best to your visitor. Just keep your post simple and well maintained, write your post with good points. And design your every post with correct images and you can also give image of every point for easily understandable, by which your visitors are easily interface with your post. So keep your post best.

At the last I want to tell you if you always remember these above given points then definitely you will get good visitor for your blog and also good comment for your post.
Read more »»  

Disqus- Best Way to increase your blog visitor


 Disqus.com is best discussion publishers community which increases more visitors to sites and blogs
We know that there are so many blogger communities, and in which every blogger share their tips and posts. Because these blogger communities are increases our blog visitor and it is good for our blog SEO (Search engine optimization). And these communities also passing links to our blog. So today I am telling you about a best blogger community which is “DISQUS”.
About Disqus: - Disqus is a best discussion site for anything in the web. There are millions of people are using Disqus in the world. And Disqus is also a publisher community and for blogger it is a blogger community which gives us so many visitors to our blog. And every site owner or blogger wants good visitor for their sites. So I think it is a best opportunity for every site owner.


How to Start it: - First of all go to Disqus.com in your browser and create a new account in it. After that fill your profile and submit your blog to its directory and Disqus very easy to use it. So create your account in it and when you write any article for your blog and publish it then it is automatically shares with Disqus and you get many visitors for your blog.

My Experience with Disqus.com:- Before a month somewhere I read about Disqus and then I directly created a account in Disqus and submitted my blog in its directory. And after a day I got many visitors by it. And then day by day I got good visitors by it for my blog. so i think this is a good blogger community for every blogger ,so I write this post.
Enjoy Blogging with us…… Wishing You a Happy New Year 2013.
Read more »»  

Some important bookmarks for every blogger


 bookmarks image for blogger


We know that bookmark is used to place any site in our browser. And also if we use some sites daily then we havkmarks for every blogger. Because bookmarks give you easily checking in any site and you can easily read and work on this. If you use the Blogger.com for blogging then you have to bookmarks all the pages of dashboard in your browser I mean you can bookmark blogger.com for open easily your account on it and other bookmarks are given below.


“Uploading images in blogger” is very important for every blogger, because in which you can easily open the bookmarks and upload any image in your blogger account and easily work for it without dashboard your blogger account.

“Create post wizard in blogger” is also a very important tab because we write our article in it so you can also create a bookmark of it in your browser for directly reach on this page and easily interface with your posts without dashboard your blogger account.

And you can also bookmarks all the blogger tabs like, layout of the blogger, changing templates of the blogger, and checking stats.


 how to create any bookmarks in any browser
The above bookmarks are only for blogger account; you can also bookmark other sites like that. And you can also create bookmarks of Google webmasters tools, Bing webmaster tools and their analytics with so many sites that you use every day. It makes your easier interface with all the sites and web pages.

So try to use bookmarks option in your browser. And enjoy blogging.
Read more »»  

No follow and do follow link for blogger


 nofollow and dofollow links for blogger

Today in this blog post I am telling you about Nofollow and Dofollow links. These links are makes our site or blog SEO better. There are many types of links are work for any site like incoming link, outgoing links, inbound links, outbound links and etc. These links are passing juice to Google and by that we get a good rank by Google. So below I giving you all details of these links which is very important for every blogger.


Now first I start about Nofollow links: - Nofollow links are those links which is search or clicked by our web viewer or by public but Google crawler are not accessed these links. It means if you are given a site link in your blog article like Google.com (which is external link) and could not write about Nofollow in it then the search engines bots are follow this links and in which your site redirected to another site and not crawl your blog or site. So always write the Nofollow attribute for external links. And when you giving the link is your post by blogger then simply click to Nofollow tab.

Example :-< a href=”google.com” rel=”Nofollow>Google.com</a>

Dofollow links: - Dofollow links are those links which is accessed by search engines crawler. And in which you can give a link of your any article on your blog so the crawlers are access it and you can get better ranking because always crawler access your own links. And it is good for your blogger SEO. Dofollow links are:- <a href=http://blogger.com> Blogger.com</a>.

Enjoy these tips.
Read more »»  

How to add a custom blogger template to your blog


 the images of custom blogger templates

In this blog post I want to tell you about how to add a custom blogger template to your blogs or we can say it how to add a Wordpress or other template to a blog. But before start I want to tell you about some of it. Custom blogger template are adopted from other sites like Wordpress and others templates site, if you want to place a attractive template in your blog then it is best for you, first of all you have to choose a custom blogger template and after that add it into your blog and show your blog attractive and give pro look to your blog. Let’s come to the main point, below I given all the points in sequence of this trick.


· First of all open your blogger account and go to dashboard.

· And now open and new tab in your browser and open the templates sites.

· Then choose any one template (which you like most) and download it into your PC.

· Now come to blogger tab and click to “templates” tab.

· Now click to Backup/Restore tab in right side above of the page and take a backup for your own template in your PC.

 backup and restore blogger full templates and upload a new custom blogger templates in blog/></a></div> <br /><br /> <div class=


• Now upload the new template that you downloaded from template site.

• Then save the settings of your blog and take a preview by clicking to layout option.

Now you find there is a new blogger template in your blog with great look that is chosen by you.
Enjoy the blogging tips and tricks by subscribing this blog.
Read more »»  

How to add a custom title in blogger


Custom title for blogger
Blogger title is one of the most important things to give nice look for blog. And we know that every blog have only one title gadget and we are directly not customize it with any image and text. Then the question is arising here how to add a custom title or header for our blog, and how to make a good title. So if you don’t know about it then I will tell you about it in this article. So let’s ready to add a custom title in your blog.
Open your blogger account and go to blogger dashboard in it.

Now click to templates tab and then open HTML in it and click to expend widget in blogger HTML screen. Now find the below given Code in this page with using CTRL+F keyboard buttons.


Code is: - <b:section id='header' maxwidgets='2\1' showaddelement='no'>
<b:widget id='your title name' locked='true' title='' type='your title name'>
<b:includable id='main'>

Now change the code:-
<b:section id='header' maxwidgets='2' showaddelement='yes'>
<b:widget id='your custom title' locked='false' title='' type='your custom title'>
<b:includable id='main'>

I mean change max widget=2, showaddelement=yes and locked=false instead of maxwidget=1,shaddelement=no and locked=true.

After changing the code save your template and come out from this page.

Now go to layout tab in your blogger and click to title gadget in the layout page now click to remove and remove it from your blogger.

configure images in blogger for custom blogger title

Now you are reaching at the last and mains, so click to add a gadget in the removed title gadget place and add a custom title or any picture of your title. Now save the gadget and click to preview for your blog and check your custom image in your title.
And if you want to know some other knowledge of blogger title then read more about how to change the fonts and color style of title and how to place blogger title in centre.
Read more »»  

How to check Google crawler access your Blog

Everybody who uses internet in the world knows about Google. And we know that Google is a best search engines in the web. So if you submit your blog to Google than Google crawler are access your blog for indexed your blog in search engines and it is good for your blog SEO. Then how to check when the Google crawlers last accessed your blog. so in this blog post I tell you about it But before proceed if you not submit your blog to Google than read more about How to submit your blog to Google Crawlers.
Google Logo

Let we come to the point, first of all open Google search engine in your browser.

Blog URL
.
Now write your blog URL in it and press enter key.
my blog images

Then you finds about your blog in the search result.
 Cached copy of my blog

Now click to Cached link given in above image and when it opens your find the last crawler access to your blog. It means Google is submitted your blog in its directory and after that your get good result by Google.
Read more »»  

How to submit a blog to Google webmaster tools

We know that Google is a No.1 search engine in the web world, and it has so many directories in which it submitted many of sites, blog and others. And the submission of sites is taken by the Google Webmaster Tools, which is grow your traffic low to very high, in which your blog is access by Google crawlers and it gives many links to your site. It is very useful to your site SEO. The Google webmaster tools are indexed your blog pages or articles in the Google directory and give good search result for your blog by which you can get more traffic for your blog.
Google Webmasters tools

So now we come to the main point how to submit your blog to Google webmaster tools.

So First of all go to the link Google Webmaster tools.


webmaster tools for blogger SEO

And sign in with your Google account in it. Now click to add a site in it and submit your Blog URL.
Upload site in Google webmaster tools

After that verify your blogger ownership by copy the given code and paste it into your blog header section before Meta tags.
Adding sitemap in Google webmaster tools

After submitting your URL and verify it now click to dashboard and click to add sitemap link and type the sitemap “ your Blogger URL and sitemap is Sitemap.xml” and save your settings and publish it on the web.

Google indexed page in Webmaster tools

And after sometimes or some days you find that your blog pages are submit in the Webmaster tools and it are indexed by Google.

And after some months you will also get Google page rank for your blogger.

Now enjoy the blogging.
Read more »»  

How to change blogger footer style

In this blog post I tell you about how to customize with blogger footer or how to change blogger footer style. If you want to make your blog good then you have to also change your blogger footer style or make multi task footer for your blog. Because if your blog look like good then many of visitor are engaged in your blog and you get more traffic. If your footer is keep with multi task and many links then you get good traffic for your blog and it also give a nice look to your blog.
Blogger footer

Every blogger wants to make their blog good and keep it best. So you have to change your blog footer so below I give you the process in which you will understand about make a good footer for your blog.

So first of all go your blogger account and sign in.


Then go to blogger Dashboard.
Dashboard of templates in blogger

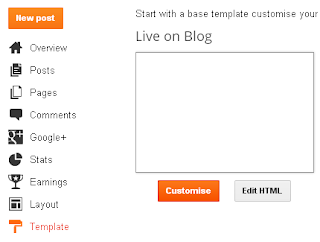
Then go to Templates link in it.
 Blogger Dashboard

Click to customize link in templates.
Blogger template designer

Now Click to layout tab in the customize templates.

Now change the footer of your blog as per given in the above images.
Layout of blogger footer

Then click to apply to blog and click to back to blog. Now you can place links and many more things in your blogger footer.

Now enjoy this blogging.
Read more »»  

How to setup a blog with Alexa

Logo of AlexaAlexa is a site ranking website, which gives ranks for sites as per there visitors. There are many of sites is linked with Alexa.com. Alexa detect the percents of visitor in a site. Now the No.1 ranking site in Alexa is facebook.com then after that Google.com and so on. Alexa gives ranking for the sites by their performance. It is updated in a day. If your site or blog have good Alexa rank it means your blog have good visitor. And also the advertisers are links with your site. So today in this blog post I tell you about how to setup your blog with Alexa Ranking.

Now I tell you about how to add your blog in Alexa Ranking?

Alexa Traffic rank

First of all make your blog and writes in it some good content articles. Then go to Alexa.com and sign up for a new account, so create your profile and save your data in it. But at this time you are not get the Alexa rank, you have to wait for some day,” I also get Alexa rank for my blog in approx. half of the month”. But getting the Alexa rank you have to do some important things which are-

Alexa Toolbar- Alexa toolbar is a web browser toolbar, in which you can check your Alexa Ranking. But first you have to download the toolbar from the Alexa site and install it in your browser. And you can also create your own toolbar in Alexa by your Alexa account, and publish it in the web. So the main thing is Alexa toolbar, so downloads it for your browser.

Contents- write the fresh and good content in your blog articles, with good keywords. So if you got good traffic then Alexa will detect your site traffic and give a rank for your site.

Update- Update your blog daily with a new and good article. Because if you update your blog daily then you get more visitor and search engines are more gives more search queries for your blog. So you can get good Alexa Ranking. And always check you’re Alexa Rank or you can check your Alexa account.

So when you are going to add your site in Alexa then keep the above points in your mind, you will definitely get good Alexa ranking.
Read more »»  

How to approve blog with Blog catalog

Blog catalog or BC is one of the best blogger communities in the world, which submit your blog in the web directory. In which you can read or write articles and discuss terms with another blogger. And it is also grow your blog traffic and useful for your blog SEO. But it is not easy to approve your blog in Blog Catalog. Because I must try it two times in which my blog is declined but when I try it third time then I get approved with Blog Catalog. So if you want to submit your blog in Blog Catalog then your blog must have followed the term and condition for better submission.
blog Catalog

And the Terms & Conditions are-


• You must verify your ownership for your blog- get the HTML code of any widget from Blog Catalog and paste it in your blog. And your blog must have Meta-Tags.

• Your blog must have at least 10 posts with unique content; Valuable contents or it is not a new blog.

• Your blog have not any pornography items.

• Writes your profile fully in Blog Catalog.

And if you have an Alexa rank than it is best for approving your blog with Blog Catalog. So if your blog follow all the above conditions then definitely your blog get approved.
But if your blog is declined first time then don’t worry about it just check your blog and submit your blog again.
Read more »»  

How to add your blog in feed burner

Feed burner is custom RSS feed service by Google, and it is a web based service for websites, blogger and publishers or podcaster. You can check your subscribers by this service. So in this blog post I tell you about how to add your blog with feed burner.
Google feed burner

First of all create a feed burner account. You can use your blogger Gmail Account for sign in on feed burner.

 Burn Feeds

Then you have to write your blog address or URL in this given space on this, after that click to next on the give link.
 feed burner

Then you reach in identify feed source, click one of them in it, you can choose 2nd link on this. And then click to next button.
process of feed burner

After next you find there lets us burn feed for you title. Now type your feed address there, type the address of your blog title or blog name, and press next button.
now feed burner is live for blogger

Now your feed becomes live and then save your setting and do some more things in feeds. And read more about feed burner widget for blog.
Read more »»  

How to add feed burner animator widget to your blog

In this blog post I am telling you about how to add feed burner animator widget in your blog. Feed burner is shows your blog readers and subscribers and it are also increase your blog on SEO. It show five recent articles titles in this widget from your blog .The feed burner service is by Google and it is use to indexed your blog or site in search engines .I think this widget is a good widget for every blogger which is show up your post by animating titles. And it is also give good look to your blog. So let’s start to make this widget for your blog.
feedburner animator

If you haven’t account of feed burner than sign in with feed burner by your Google mail ID. And then type your blogger URL in this box ,and do all steps in it, and you can also click on the given link to read more about adding blog in feed burner. And finally you got feeds for your blog.

feed animator properties

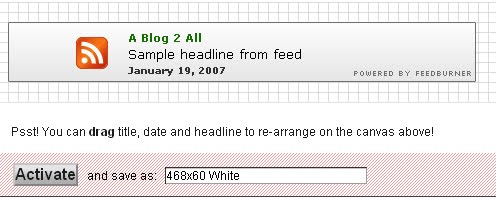
Now click your blog in feeds and go to Publicize tab in it. Now ready to start attracting subscribers to your blog. Click to Headline Animator link in it.
feedburner animator

Now choose appropriate animator to your blog and click to activate link on below of the page.
feedburner headlines animator

Now choose blogger on the add drop down menu. And then click to next after that save this in your blog where you want to show it. And check your blog, if you do all things right than finally you got this but if not then recheck this post and read carefully.
Read more »»  

How to centre your blog title

When I make my blog then I think about how to centre my blog title and I search many times it in web, but I am not satisfied by anyone. But after sometimes I got this trick by myself when I customizing my blog and take some changes in my blog. When I got this trick I really happy to see this. So now I tell you about this to beginners blogger and everyone blogger because it is also give a nice look to your blog. So If you want to do centre your blog title then check this trick it is very easy to use in blogger, simply you have to add some CSS code in it and you get it.
blogger title

So let’s start to work on this trick.

First of all go to your blogger account and sign in and then click to dashboard.

Then Go to Templates tab and click to customize.
                            customize blogger title


After that go to Advance tab and
blogger templates designer

click on this and click to add CSS.
adding css in blogger template designer

Now type this code in it
Code is- .header-outer {
Margin-left:260px;
}

And choose the Pixel above 260 and type the pixel as well as title when your title is come to the centre then save your settings or click to apply to blog and check your blog.

Now you get you blog title to centre.

Enjoy this trick.
Read more »»